Workspaces - Creating a workspace
Workflow and Steps
To create a new workspace we need to do the following:
• Create a new workspace in the Workspaces library
• Set the workspace template
• Save
These steps are covered in detail below.
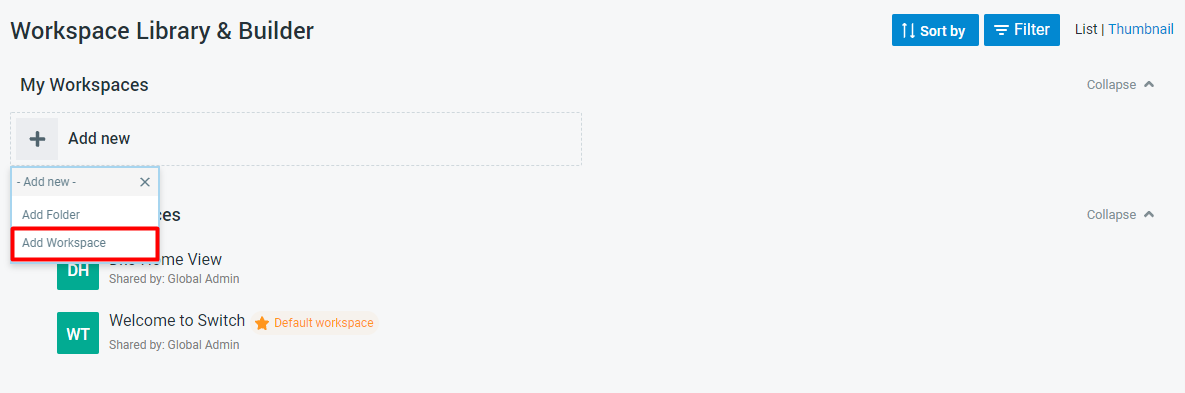
Create new workspace
To create a new workspace click the 'Add new' button in the Workspaces Library & Builder and select 'Add Workspace'.
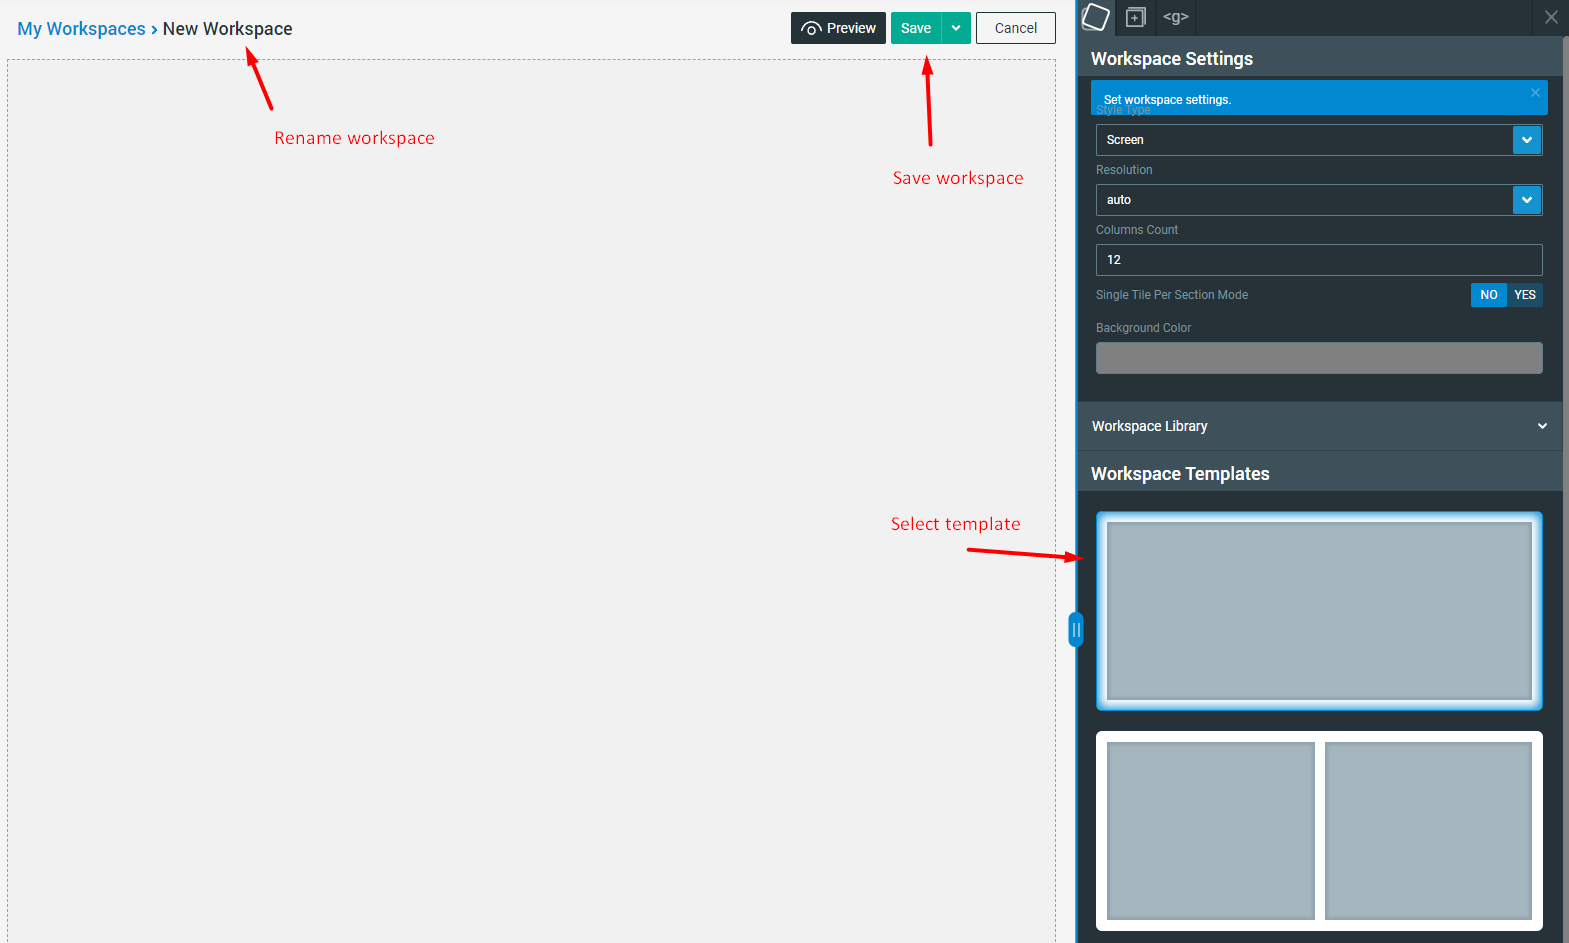
Configure new workspace
After creating a new workspace in the step before you will be presented with a new workspace template.
In order to finish creating a new workspace we need to select the 'Workspace Template' from the right hand side menu. These templates control how the workspace is divided up for your tiles. We cover these settings in more detail in the Detailed Documentation part of this guide. For now, just select the top template which gives us a blank single area workspace.
After selecting the 'Workspace Template' the Save button will become visible in the header buttons as pictured below.
Save
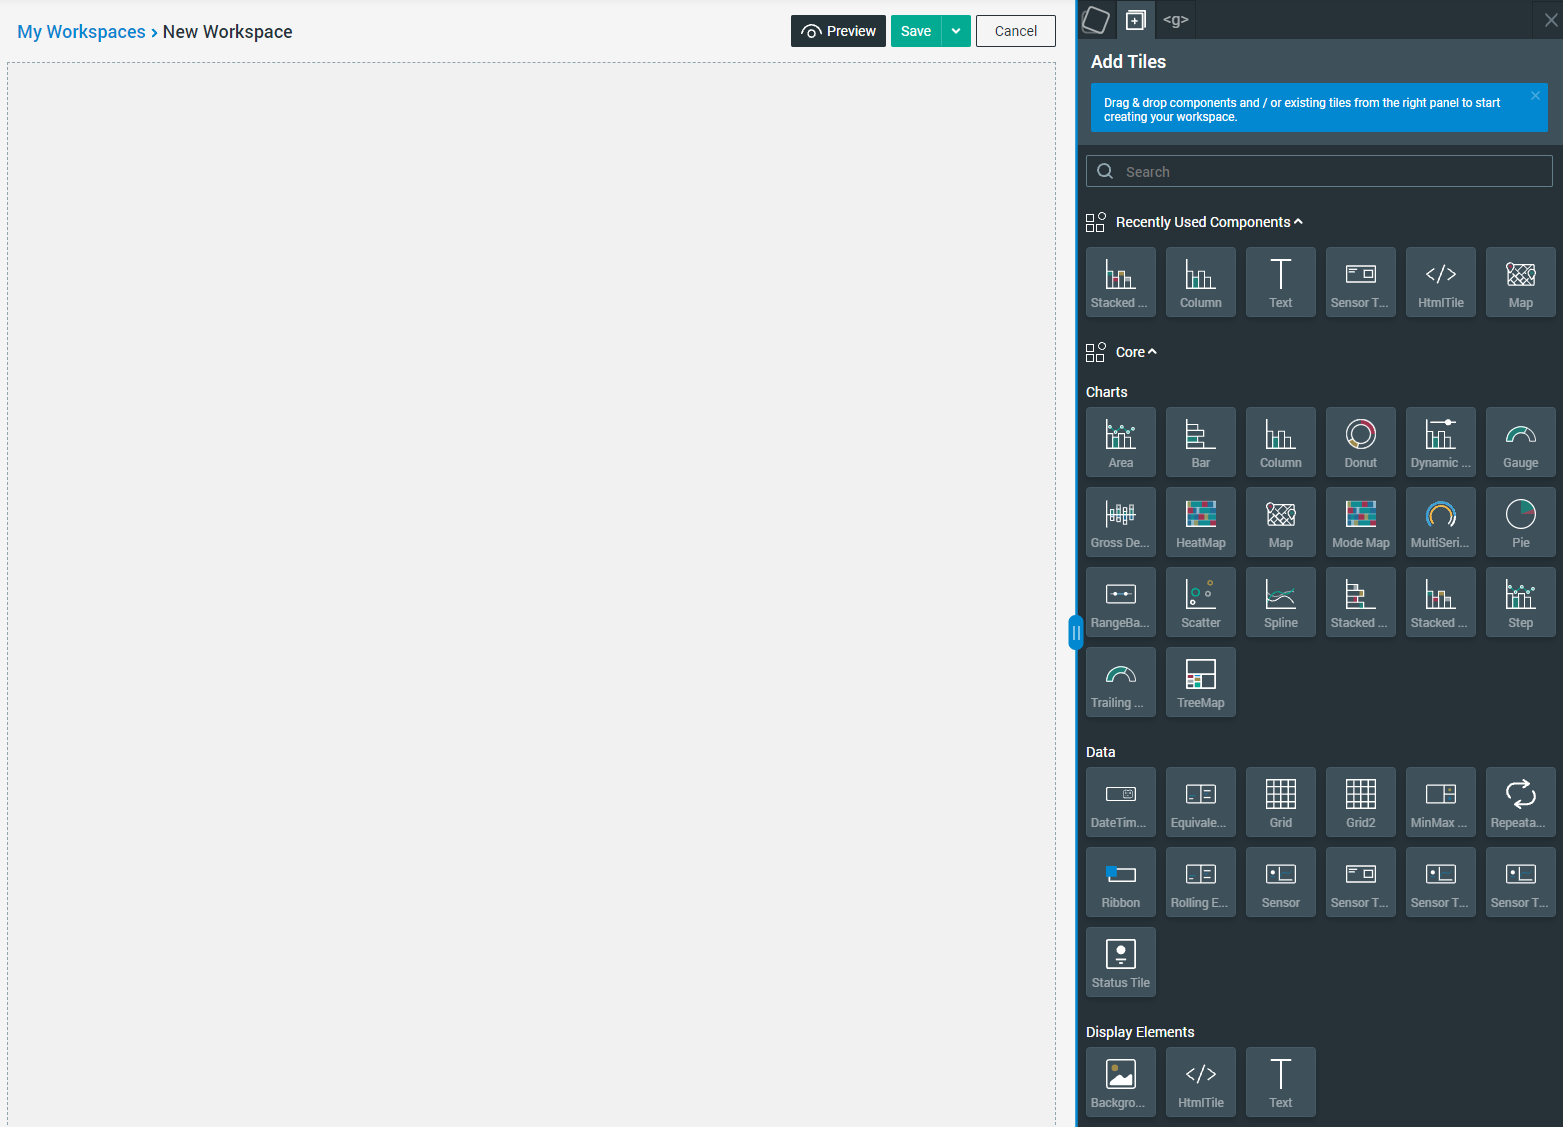
In order to complete the workspace creation you must click the Save button pictured above! Once done your workspace has successfully been created and you should see the Tile Library panel in the right hand side menu.
Recap
In summary we have:
1. Selected "Add new" -> "Add Workspace"
2. Set the "Workspace Template"
3. Pressed "Save"